操作数据库
可以通过两种方式操作数据库
如果只需要操作一张数据表,建议使用数据表元素, 如果需要联表查询,则需要使用数据库客户端。
使用数据库客户端
数据库客户端类似于传统的数据库连接类,根据参数的不同会选取合适的组件进行实例化,从而提供一个全局可用的数据库客户端。
首先导入数据库客户端类
[2]:
from deepfos.db.mysql import MySQLClient
实例化
[3]:
client = MySQLClient()
MySQLClient接受一个关键字参数version,如果提供该参数,将会使用指定版本的数据表组件,否则将随机获取一个可用数据表组件。
所以,除了上述初始化方式,下述方式也可以:
[4]:
client = MySQLClient(version='1.0')
client = MySQLClient(version=1.0)
查询数据
无数据表或已知真实表名
使用query_dfs方法执行sql可以获取Dataframe格式的数据,方便后续操作。
[5]:
client.query_dfs("select 1")
[5]:
| 1 | |
|---|---|
| 0 | 1 |
query_dfs支持传入多个sql,将以列表形式返回Dataframe
[6]:
df1, df2 = client.query_dfs(("select 1", "select 2"))
[7]:
df1
[7]:
| 1 | |
|---|---|
| 0 | 1 |
[8]:
df2
[8]:
| 2 | |
|---|---|
| 0 | 2 |
上述示例中都没有出现数据表,在不涉及数据表或者你明确知道你要查询的数据表的真实表名时,可以采用上述方式查询。
然而多数情况下,在平台中,我们只能看到数据表元素名,而元素名并不是数据表在数据库的真实表名。 这时候就需要通过以下方式查询:
根据元素信息查询
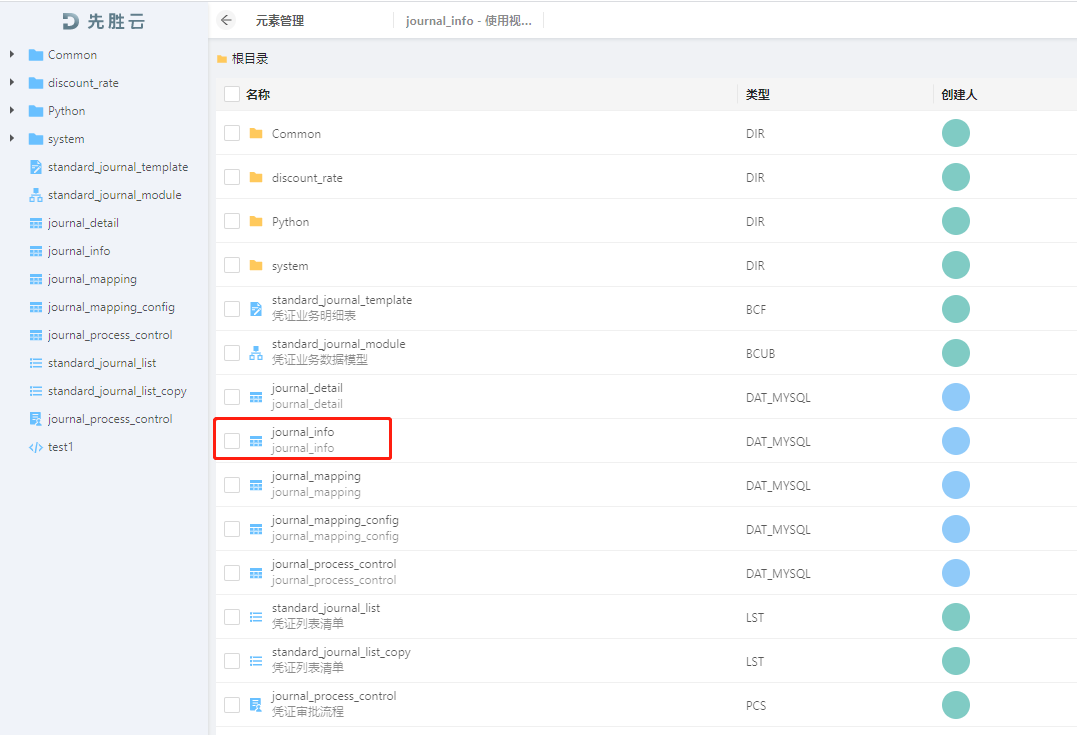
例如平台中存在一个元素名为journal_info的数据表,但是我们并不知道其实际表名。

此时我们可以使用占位符${} + 表名的方式调用。
[9]:
sql = """
SELECT
    journal_id, journal_type, post_date, approve_status
FROM ${journal_info}
LIMIT 10
"""

client.query_dfs(sql)
[9]:
| journal_id | post_date | approve_status | journal_type | |
|---|---|---|---|---|
| 0 | E20210813141305480771 | 2021-08-13 14:13:05 | 3 | J31 |
| 1 | E20210813141306102595 | 2021-08-13 14:13:06 | 3 | J31 |
| 2 | E20210813141306457132 | 2021-08-13 14:13:06 | 3 | J31 |
| 3 | E20210813141306641577 | 2021-08-13 14:13:06 | 3 | J31 |
| 4 | E20210813141759821356 | 2021-08-13 14:17:59 | 3 | J31 |
| 5 | E20210813141759982661 | 2021-08-13 14:18:00 | 3 | J31 |
| 6 | E20210813141800146706 | 2021-08-13 14:18:00 | 3 | J31 |
| 7 | E20210813141800304931 | 2021-08-13 14:18:00 | 3 | J31 |
| 8 | E20210813142222678644 | 2021-08-13 14:22:22 | 3 | J31 |
| 9 | E20210813142222856594 | 2021-08-13 14:22:22 | 3 | J31 |
支持多表联合查询(UNION, JOIN等)
[10]:
sql = """
SELECT
    sb_id
FROM
    ${journal_info}
UNION
SELECT
    journal_id
FROM
    ${journal_detail}
LIMIT 10
"""

client.query_dfs(sql)
[10]:
| sb_id | |
|---|---|
| 0 | 1 |
| 1 | 2 |
| 2 | 3 |
| 3 | 4 |
| 4 | J1MP07QP6C1N1BU3 |
| 5 | J1MP07QP6C5FLRK4 |
| 6 | J1MP07QP6C89PP3C |
| 7 | J1MP07QP6G1K3P4S |
| 8 | J1MP07TFDKO0S1H7 |
| 9 | J1MP07TFDKO0S2AI |
增删改
数据库的增删改操作统一使用函数exec_sqls执行,函数签名与query_dfs完全相同
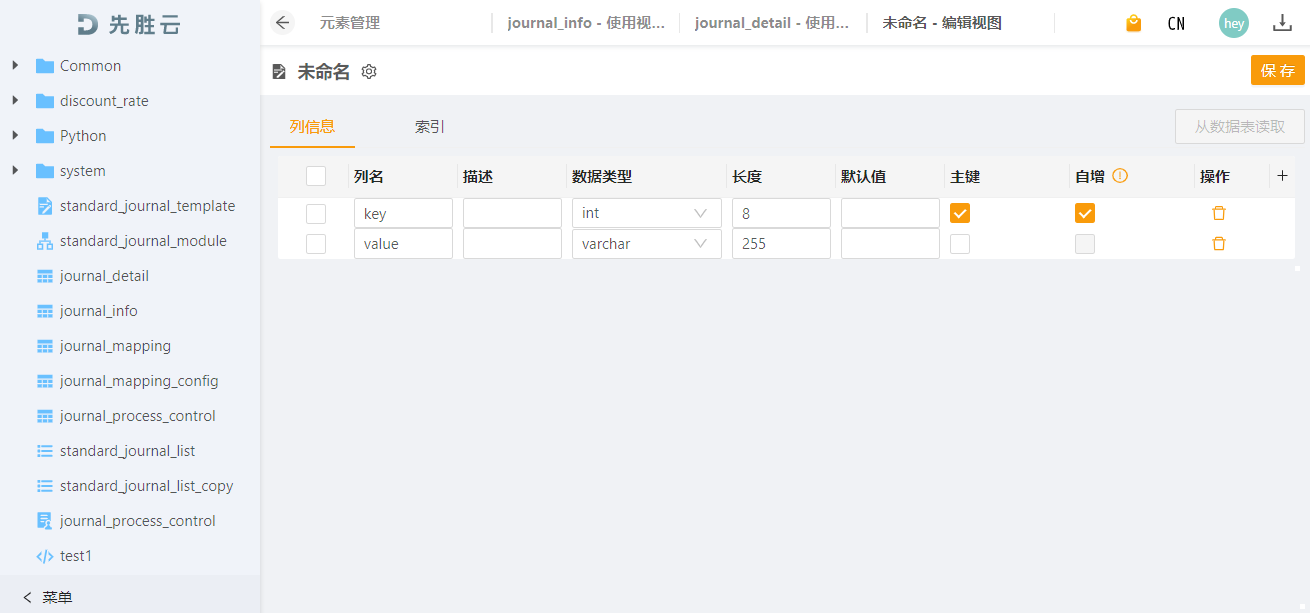
新建一个数据表如下所示,命名为table_example

使用insert语句插入数据
[11]:
client.exec_sqls("insert into ${table_example} set value='999'")
[11]:
{'selectData': [],
 'updateSuccessCount': 0,
 'deleteSusccessCount': 0,
 'insertSuccessCount': 1}
也可以执行多句sql
[12]:
client.exec_sqls(["insert into ${table_example} set value='hello'", "insert into ${table_example} (value) values ('world'), ('end')"])
[12]:
{'selectData': [],
 'updateSuccessCount': 0,
 'deleteSusccessCount': 0,
 'insertSuccessCount': 2}
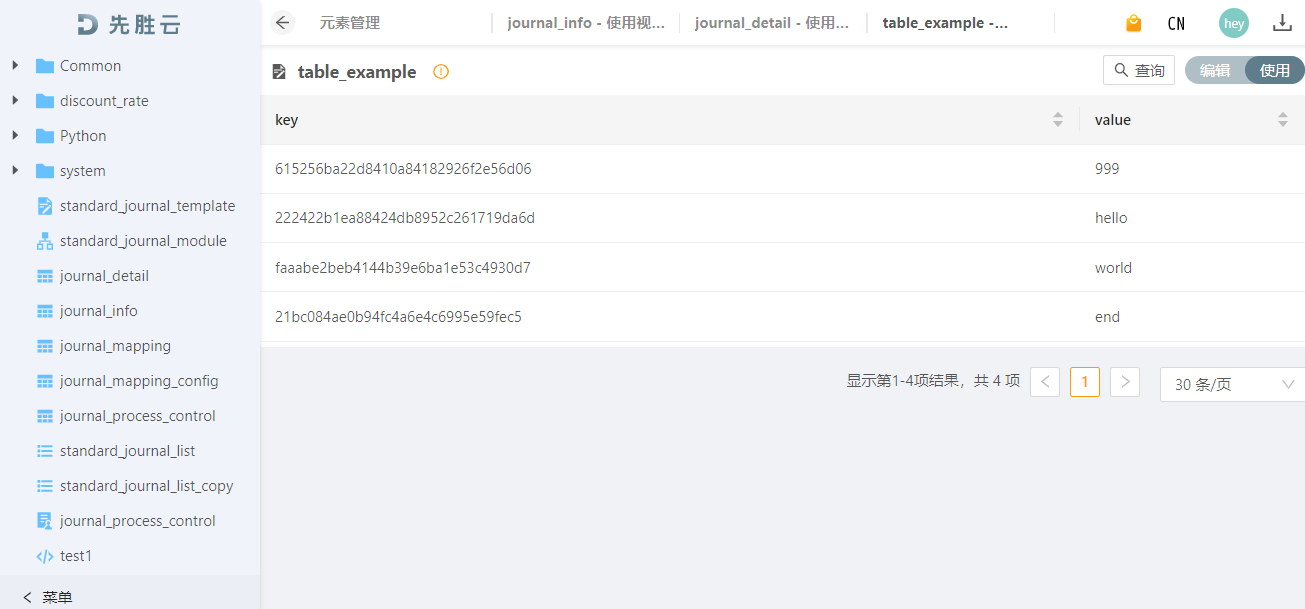
查看执行结果:

也可以混搭update, delete, insert语句,每次调用将作为事务执行。即:只有当所有sql执行成功,结果才会被提交,否则将被回滚。
[13]:
client.exec_sqls(["delete from ${table_example} where `key` > 5", "update ${table_example} set value='start' where value='end'"])
[13]:
{'selectData': [],
 'updateSuccessCount': 1,
 'deleteSusccessCount': 1,
 'insertSuccessCount': 0}
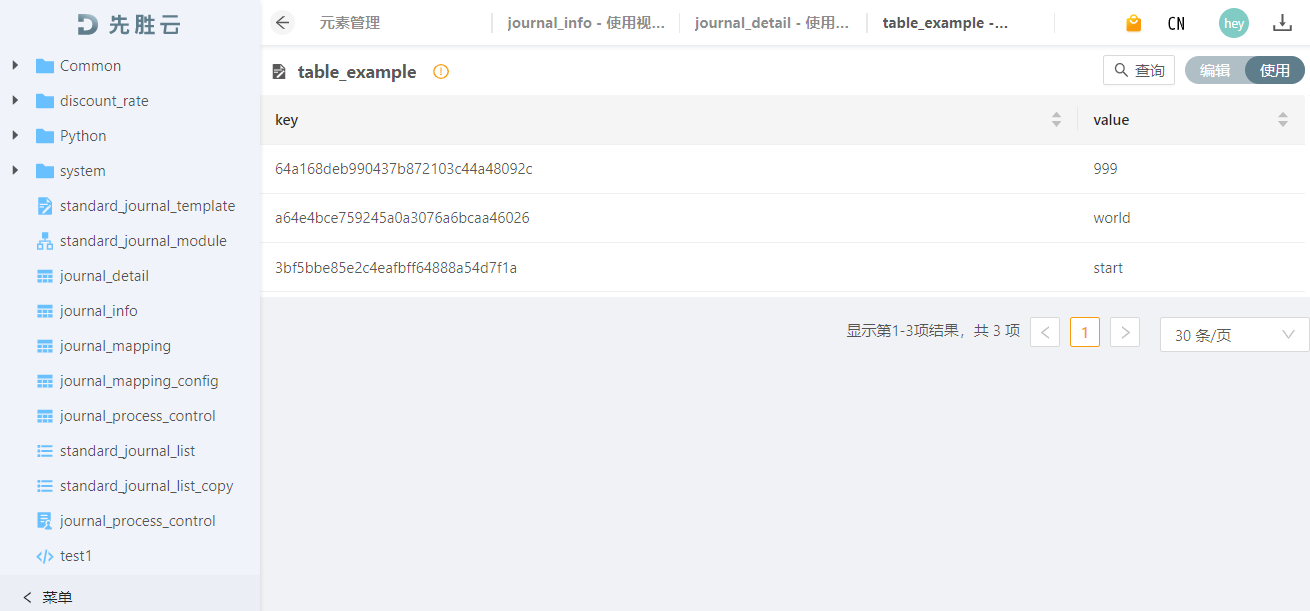
执行结果:

使用数据表元素
使用数据库客户端可以很方便地进行数据库操作,但是也有一些局限性。因为传输过程需要转换为JSON格式,不可避免地会丢失字段类型。数据库客户端因为其高度自由的sql执行方式,导致从代码层面也很难查询到原始表的信息。因此查询获取的数据将只存在字符串或者数字类型,例如时间格式的信息将会丢失。
如果仅仅需要对单个数据表进行操作,那么使用数据表元素将更加合适。
初始化数据表元素
使用数据表元素名可以实例化一个数据表元素对象, 下面用DataTableMySQL作为例子,ClikHouse表可使用DataTableClickHouse,除了delete方法外,其余方法使用时没有任何区别。
[14]:
from deepfos.element.datatable import DataTableMySQL
example = DataTableMySQL("table_example")
查询数据
[15]:
example.select()
[15]:
| value | key | |
|---|---|---|
| 0 | 233 | 1 |
| 1 | hello | 2 |
| 2 | world | 3 |
| 3 | start | 4 |
| 4 | 999 | 5 |
select方法能够指定查询字段和查询条件
[16]:
journal_info = DataTableMySQL("journal_info")

t = journal_info.table
columns = ["journal_id", "journal_type", "post_date", "approve_status"]
where = (t.approve_status == 3) & (t.post_date.isnotnull())

data = journal_info.select(columns, where=where, limit=10)
data
[16]:
| journal_id | post_date | approve_status | journal_type | |
|---|---|---|---|---|
| 0 | E20210813141305480771 | 2021-08-13 14:13:05 | 3 | J31 |
| 1 | E20210813141306102595 | 2021-08-13 14:13:06 | 3 | J31 |
| 2 | E20210813141306457132 | 2021-08-13 14:13:06 | 3 | J31 |
| 3 | E20210813141306641577 | 2021-08-13 14:13:06 | 3 | J31 |
| 4 | E20210813141759821356 | 2021-08-13 14:17:59 | 3 | J31 |
| 5 | E20210813141759982661 | 2021-08-13 14:18:00 | 3 | J31 |
| 6 | E20210813141800146706 | 2021-08-13 14:18:00 | 3 | J31 |
| 7 | E20210813141800304931 | 2021-08-13 14:18:00 | 3 | J31 |
| 8 | E20210813142222678644 | 2021-08-13 14:22:22 | 3 | J31 |
| 9 | E20210813142222856594 | 2021-08-13 14:22:22 | 3 | J31 |
上述代码实际执行了SQL:
SELECT
    `journal_id`,
    `journal_type`,
    `post_date`,
    `approve_status`
FROM
    `ehcdge005_journal_info_vw5x0`
WHERE
    `approve_status`= 3
    AND `post_date` IS NOT NULL
LIMIT 10
ehcdge005_journal_info_vw5x0是journal_info表的真实表名
查询结果将根据列的字段类型自动作转换
[17]:
[type(data.iloc[0, i]) for i in range(4)]
[17]:
[str, pandas._libs.tslibs.timestamps.Timestamp, str, str]
注意
关于where条件的入参,虽然目前还支持字符串输入,但是在2.0版本将会移除对字符串的支持。不推荐使用!
说明
t = journal_info.table将获取pypika的Table对象,t.post_date可以认为是表的一个列,列对象提供了很多比较函数用于匹配sql查询条件,所有的查询条件都可以用类似的语法完成,相较于原生sql有更好的可维护性。
更多功能可以参考pypika的官方文档: pypika
直接将DataFrame入库
[18]:
import pandas as pd
insert_data = pd.DataFrame([
    {
        "key": 22,
        "value": "value1 from dataframe"
    },
    {
        "key": 23,
        "value": "value2 from dataframe"
    }
])
insert_data
[18]:
| key | value | |
|---|---|---|
| 0 | 22 | value1 from dataframe |
| 1 | 23 | value2 from dataframe |
[19]:
example.insert_df(insert_data)
[19]:
{'selectData': [],
 'updateSuccessCount': 0,
 'deleteSusccessCount': 0,
 'insertSuccessCount': 1}
[20]:
example.select()
[20]:
| value | key | |
|---|---|---|
| 0 | 233 | 1 |
| 1 | hello | 2 |
| 2 | world | 3 |
| 3 | start | 4 |
| 4 | 999 | 5 |
| 5 | value1 from dataframe | 22 |
| 6 | value2 from dataframe | 23 |
插入少量数据
如果只需要插入极少量的数据,那么不需要特定将数据转化为dataframe,使用insert方法将更加便捷
[21]:
example.insert(value_map={
    'value': 'test_insert',
    'key': 25
})
example.select()
[21]:
| value | key | |
|---|---|---|
| 0 | 233 | 1 |
| 1 | hello | 2 |
| 2 | world | 3 |
| 3 | start | 4 |
| 4 | 999 | 5 |
| 5 | value1 from dataframe | 22 |
| 6 | value2 from dataframe | 23 |
| 7 | test_insert | 25 |
[22]:
example.insert(
    value_list=[
        ['test_insert_vl', 26],
        ['test_insert_vl', 27]
    ],
    columns=['value', 'key']
)
example.select()
[22]:
| value | key | |
|---|---|---|
| 0 | 233 | 1 |
| 1 | hello | 2 |
| 2 | world | 3 |
| 3 | start | 4 |
| 4 | 999 | 5 |
| 5 | value1 from dataframe | 22 |
| 6 | value2 from dataframe | 23 |
| 7 | test_insert | 25 |
| 8 | test_insert_vl | 26 |
| 9 | test_insert_vl | 27 |
更新数据
[23]:
t = example.table
example.update({"value": "updated"}, where=t.key==22)
example.select()
[23]:
| value | key | |
|---|---|---|
| 0 | 233 | 1 |
| 1 | hello | 2 |
| 2 | world | 3 |
| 3 | start | 4 |
| 4 | 999 | 5 |
| 5 | updated | 22 |
| 6 | value2 from dataframe | 23 |
| 7 | test_insert | 25 |
| 8 | test_insert_vl | 26 |
| 9 | test_insert_vl | 27 |
事务
start_transaction 方法能够提供事务支持,在with上下文中的sql语句将会作为事务执行。
[24]:
with example.start_transaction():
    example.insert(
        value_list=[
            ['test_txn1', 11],
            ['test_txn2', 12]
        ],
        columns=['value', 'key']
    )
    example.update({'value': 'test_txn3'}, where=t.key==11)

example.select()
[24]:
| value | key | |
|---|---|---|
| 0 | 233 | 1 |
| 1 | hello | 2 |
| 2 | world | 3 |
| 3 | start | 4 |
| 4 | 999 | 5 |
| 5 | test_txn3 | 11 |
| 6 | test_txn2 | 12 |
| 7 | updated | 22 |
| 8 | value2 from dataframe | 23 |
| 9 | test_insert | 25 |
| 10 | test_insert_vl | 26 |
| 11 | test_insert_vl | 27 |
注意
数据表的增删改api都支持事务,select即使在事务内执行也会立即返回结果。
ClickHouse不支持事务
删除数据
[25]:
example.delete(where=t.key > 10)
example.select()
[25]:
| value | key | |
|---|---|---|
| 0 | 233 | 1 |
| 1 | hello | 2 |
| 2 | world | 3 |
| 3 | start | 4 |
| 4 | 999 | 5 |